

Undertaking a complete system upgrade in your home, whether it involves electrical, plumbing, flooring, or structural changes, can feel overwhelming without a clear plan. The difference between a smooth renovation and a stressful one often comes down to preparation done weeks before the first contractor ever arrives. Thinking through logistics, budgets, and daily living arrangements ahead of time helps you avoid costly delays and unexpected surprises. This guide walks through the key steps homeowners should take before diving into a major home system overhaul.
- Mapping Out Your Renovation Timeline
- Reviewing Your Coverage Before Work Begins
- Keeping Your Household Running Smoothly During Construction
- Assessing the Condition of Your Roof First
- Planning for Outdoor Comfort and Energy Efficiency
- Rethinking Your Kitchen Layout and Function
- Preparing for Power Outages During and After Construction
- Improving Water Quality Throughout the Home
- Selecting Durable Flooring for High-Traffic Areas
Mapping Out Your Renovation Timeline

Before any work begins, it helps to think about how your project compares to starting fresh. Many of the lessons learned from new home construction projects, like sequencing plumbing before drywall or electrical before insulation, apply directly to whole-home upgrades. The same “rough-in before finish” logic that governs a builder’s schedule should shape yours, even though you’re working around existing walls, floors, and finishes rather than an open frame.
A realistic timeline typically breaks into phases: demolition and prep, rough-in for major systems, inspections, insulation and drywall, then finish work like flooring, fixtures, and paint. Depending on the scope, a full system upgrade can run anywhere from six weeks to four months, with HVAC and electrical work often needing three to five days per major zone. Building in buffer time of at least 10-15% for permit delays, inspection scheduling, or backordered materials will save you from constant rescheduling.
Creating a realistic timeline also prevents contractors from working over each other and reduces the chance of rework, especially when plumbers, electricians, and HVAC technicians all need access to the same walls or crawl spaces. Sequencing matters: rough plumbing and electrical should be roughed in and inspected before insulation goes in, and insulation should pass inspection before drywall closes everything up.
A written schedule also gives you a reference point when things inevitably shift. Share it with every contractor involved, and ask each one to flag dependencies, like needing another trade to finish before they can start, so delays don’t cascade silently through the whole project.
Start by listing every system you plan to touch—electrical, plumbing, HVAC, roofing, insulation—then work backward from your ideal completion date. Sequence matters: electrical and plumbing rough-ins typically need to happen before drywall goes up, while HVAC ductwork often has to be finalized before insulation is installed. Mapping these dependencies on a simple calendar or project board helps you see which delays will create bottlenecks elsewhere.
Build in buffer time for permitting delays, material backorders, and inspection scheduling, since these are the most common causes of project slowdowns. As a rule of thumb, add 15-20% extra time to your original estimate for a multi-system renovation, and expect permit approval alone to take anywhere from a few days to six weeks depending on your municipality. Specialty materials like custom HVAC units or upgraded electrical panels can also have lead times of eight weeks or more, so order early.
Finally, coordinate inspection windows with your contractor in advance, since many jurisdictions require sign-off at each stage—rough-in, mid-construction, and final—before work can proceed. Missing an inspection slot can stall an entire project by a week or more, so build those checkpoints directly into your timeline rather than treating them as an afterthought.
- Request a written timeline from each contractor before signing agreements, including start dates, estimated duration, and buffer days for delays
- Group similar trades together to minimize repeat visits — for example, schedule electrical and HVAC rough-in during the same week before drywall goes up
- Confirm permit requirements with your local building department early, since approval can take anywhere from a few days to several weeks depending on scope
- Sequence work logically: demolition, structural or electrical/plumbing updates, insulation, drywall, then finishes, so trades aren’t undoing each other’s work
- Set milestone check-ins every two weeks to track progress and catch scheduling conflicts before they cascade
- Build in a 10-15% time cushion for unexpected issues like material shortages or inspection delays
Reviewing Your Coverage Before Work Begins
Large-scale renovations can change the risk profile of your property, which makes it important to review your policy before crews show up. Many homeowners insurance providers require notification when structural, electrical, or plumbing systems are being replaced, since these upgrades affect both liability and rebuild value. Skipping this step can leave you exposed if damage occurs mid-project or if a claim is denied due to undisclosed work. A quick call to your agent can clarify what is and isn’t covered during construction.
It’s also worth asking whether your insurer offers premium adjustments once upgrades are complete, since newer systems often reduce risk and can lower long-term costs.
- Ask your provider about coverage gaps during active construction
- Request documentation of upgrades for future claims or resale purposes
- Confirm whether contractors carry their own liability insurance
- Update your policy immediately after major system replacements
Keeping Your Household Running Smoothly During Construction
Living through a major upgrade means thinking about day-to-day comfort, not just the finished result. If your project involves heating system work, homeowners relying on home heating oil should plan deliveries around the construction schedule to avoid running low during cold months. Coordinating fuel deliveries with your contractor’s timeline prevents awkward scheduling conflicts, especially if equipment needs to be temporarily disconnected. Planning ahead here is a small detail that makes a noticeable difference in comfort.
- Schedule fuel deliveries a week before major heating system work begins
- Ask your contractor how long the system will be offline
- Arrange backup heating if work extends into colder weather
- Keep contact information for emergency fuel service on hand
Assessing the Condition of Your Roof First

Before investing in interior upgrades, it makes sense to confirm that the roof over your head is in good shape. Many experienced roof installers recommend a full inspection before any major renovation, since water damage from an aging roof can undo new flooring, drywall, or electrical work in a hurry. Catching problems early also prevents surprises once interior walls are opened up. A roof in good condition protects every other upgrade you’re about to invest in.
If your roof is nearing the end of its lifespan, it may be worth replacing it before starting other projects rather than after. This sequencing avoids the risk of new interior finishes being damaged by leaks discovered later.
- Check for missing shingles, sagging areas, or water stains
- Ask for a written estimate on remaining roof lifespan
- Time roof replacement before interior renovations when possible
- Inspect attic insulation for signs of past leaks
Planning for Outdoor Comfort and Energy Efficiency
Whole-home upgrades often extend beyond the interior, and outdoor living spaces deserve attention too. Adding a home awning can reduce indoor heat gain during summer months, which eases the load on your cooling system and improves comfort on patios or decks. Retractable models offer flexibility since they can be extended during peak sun hours and pulled back when you want more light, while fixed awnings provide consistent shade with less maintenance.
Beyond comfort, a well-placed awning can meaningfully cut cooling costs. Studies on shading solutions suggest that awnings on south- and west-facing windows can lower solar heat gain by 65 to 77 percent, which translates into real savings on energy bills during hot months. Material choice matters too: acrylic fabrics resist fading and mildew, while vinyl options tend to hold up better in humid or rainy climates.
This is a relatively simple addition that pairs well with larger renovation projects since exterior work is often already underway. Homeowners upgrading windows or siding may find it convenient to install awnings at the same time to avoid repeat labor costs, shared scaffolding, and mismatched color finishes. Coordinating these projects also gives contractors a chance to check that mounting points, drainage, and structural supports are properly reinforced before final exterior finishes are applied.
- Choose retractable awnings or screens for flexible sun control, letting you adjust shade throughout the day or fully retract during storms
- Consider motorized options with remote or app control, plus wind and sun sensors that automatically retract in gusts above 20-25 mph
- Match materials and colors to your home’s exterior style—aluminum frames for modern homes, wood tones for traditional facades
- Factor in fabric grade, since solution-dyed acrylic resists fading better than standard polyester in high-UV climates
- Time installation alongside roofing, siding, or window projects to share scaffolding, permits, and labor costs
- Confirm electrical rough-in for motorized units happens before exterior finishes are completed, avoiding costly rework later
Rethinking Your Kitchen Layout and Function
The kitchen is often the centerpiece of a whole-home renovation, and it deserves careful planning since it involves plumbing, electrical, and structural elements all at once. Working with a kitchen remodeling company early in the process helps ensure appliance placement, ventilation, and wiring are planned correctly the first time. Rushing this stage often leads to costly changes later, especially once cabinetry or countertops are installed. A well-planned layout also improves daily function long after the renovation is complete.
Consider how your kitchen connects to other systems being upgraded, such as water lines or electrical panels, so everything is coordinated rather than handled in isolation.
- Map out appliance placement before finalizing cabinet layouts
- Confirm electrical capacity for new appliances
- Plan ventilation early to avoid moisture issues
- Discuss lighting placement alongside plumbing rough-in
Preparing for Power Outages During and After Construction
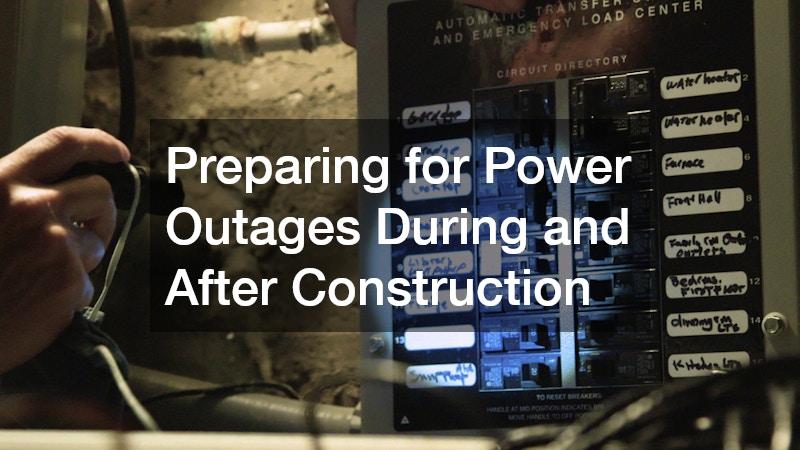
Major renovations sometimes require temporary power shutoffs, and homeowners in areas prone to outages may want to consider backup power as part of the overall plan. Consulting a whole house generator company during the renovation planning stage can help determine proper sizing and placement before walls are closed up. This is far easier to plan during construction than to retrofit afterward. Having reliable backup power also protects newly installed systems like water heaters, HVAC equipment, and security systems from damage caused by sudden outages.
- Determine your home’s total power needs before choosing a generator size
- Ask about placement requirements for ventilation and noise
- Coordinate electrical panel upgrades with generator installation
- Test backup systems seasonally once installed
Improving Water Quality Throughout the Home
Whole-home upgrades are a good opportunity to address water quality issues that may have been ignored for years. Installing a whole house water system during a larger renovation allows plumbers to integrate filtration or softening equipment directly into existing lines without additional demolition later. Because walls and floors are already open during a major renovation, this is often the only time homeowners can add this kind of equipment without incurring significant additional labor costs.
This is especially useful for homes with hard water, sediment issues, or older plumbing that affects water clarity. A basic water test can reveal mineral content, pH imbalance, or contaminants like iron and manganese that standard fixtures aren’t designed to handle. Depending on the results, contractors may recommend a combination of solutions, such as a sediment pre-filter, a water softener for calcium and magnesium buildup, or a carbon filtration system to improve taste and odor.
Addressing this now can also extend the life of new appliances and fixtures being installed as part of the project. Hard water alone can reduce the efficiency of water heaters and dishwashers by causing scale buildup over time, sometimes cutting appliance lifespan by several years. Factoring water treatment into the upgrade budget upfront also tends to be more cost-effective than retrofitting a system after finishes and fixtures are already in place.
- Test your water quality before choosing a filtration system — a $15-20 home test kit or a professional lab analysis can reveal hardness, pH, iron, and contaminant levels.
- Ask about maintenance requirements for different system types, such as filter cartridge swaps every 3-6 months or annual resin bed regeneration for softeners.
- Coordinate installation with other plumbing work, like pipe replacement or fixture upgrades, to avoid paying for separate service calls and labor fees.
- Consider systems that address both filtration and softening, such as combination units pairing a carbon filter with an ion-exchange softener.
- Factor in ongoing costs, including salt for softeners (roughly $5-10 per 40-lb bag) and periodic filter replacements, when comparing options.
- Check your household’s water pressure and flow rate so the new system doesn’t cause noticeable drops at multiple fixtures.
Selecting Durable Flooring for High-Traffic Areas

Flooring choices affect both the look and long-term durability of your home, especially in busy areas like kitchens, entryways, and hallways. Many homeowners choose luxury vinyl flooring for its water resistance and ability to mimic natural materials at a lower cost than hardwood or stone. This makes it a practical option for households with kids, pets, or heavy foot traffic. It also pairs well with radiant heating systems if those are part of your upgrade plan.
For garages and utility spaces, protecting the surface is just as important as choosing the right interior flooring. Garage floor coatings help resist stains, cracking, and moisture damage, extending the life of the space while improving its appearance. Applying these coatings during a larger renovation is often more convenient since the garage may already be cleared out for other work.
- Compare wear layers when choosing luxury vinyl flooring options
- Ask about installation timelines for large square footage
- Choose garage floor coatings rated for vehicle traffic
- Confirm cure times before returning items to the garage
Preparing for a whole-home system upgrade takes patience, research, and a willingness to think several steps ahead. By addressing structural, mechanical, and cosmetic details together rather than piecemeal, you set the stage for a smoother renovation and a more resilient home overall. Take time to gather quotes, ask detailed questions, and confirm timelines before committing to any single contractor. With the right preparation, your upgraded home will function better and last longer for years to come.